It has been a journey that’s for sure. I had many plans and ideas on how I wanted to end my baking experience but because of the current situation with COVID-19 I wasn’t able to obtain all the ingredients that I needed and was uneasy about going out to such crowded areas. My end goal was to bake a loaf of bread and experiment further with using yeast or a starter, I thought it would be the ultimate goal and challenge for me. But due to the unfortunate circumstances I will postpone that challenge until a later date and instead finish this inquiry with how it all started; chocolate chip cookies.
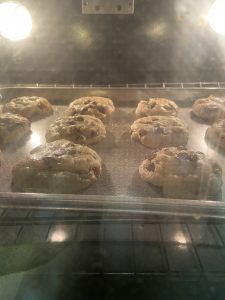
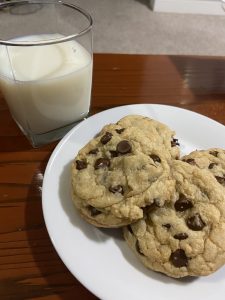 I baked a fresh batch tonight for a yummy study snack and to relieve some of the stress that these past few weeks have built up. I first started with my research trying to find the best gooey chocolate chip cookie I could find to suit my craving. I settled with Tasty’s recipe because they are always on point and got to work creaming my wet ingredients. One the wet ingredients looked like silk I added my flour, baking soda and chocolate chips. After mixing it all together I formed my cookies and set them into the oven for 12 minutes. Now let me tell you, I think I have hit the goldmine with this cookie recipe. I don’t know if it was because I was stressed and tired and hungry but the taste of a warm gooey chocolate chip cookie dipped into a glass of cold milk was what I imagine the cookies in heaven taste like. It was just what I needed. It helped me reflect and remind myself of the home runs and strike outs that I encountered during my baking experience.
 It all started with the chocolate chip oatmeal cookies that I baked back in January. I chose this recipe because it was something that I was somewhat familiar with and is in the easy category of baking. I was able to practice the basics of baking which is separating your wet and dry ingredients then combining them later. This recipe was also something that allowed me to help build up my baking confidence which prepared me for the rest of the semester. I remember saying in that blog that I didn’t feel like I was doing homework and that it just felt fun. From day 1 I started to look at the assignment as a break from studying and a good way to treat myself for working so hard. This mindset is what I think helped me continue and learn throughout this inquiry.
After making cookies I made carrot muffins which ended up tasting really good and going well. But I do have an update that I didn’t blog about… Two days after I made the muffins I went to go pack one for lunch and I noticed that all the carrot bits turned green! Crazy right?! At first I thought they were moldy but after pondering that thought I realized that there was no way that after two days they could possibly be already moldy so I googled it and found out that I made a chemical reaction! So fun fact, apparently if you do not thoroughly combine your baking soda it can turn your carrots green! So I did learn something there. This recipe also allowed me to gain experience towards how to bake muffins and properly line the pan.
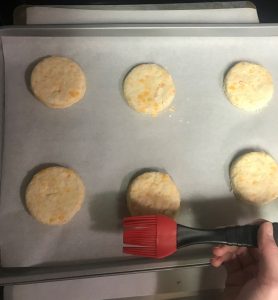
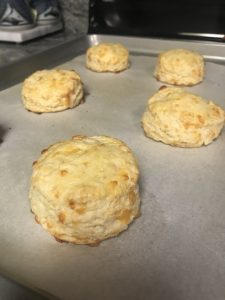 The next baked good I conquered was scones. I decided to make cheese scones so I could learn how to create flaky layers in scones and similar pastries. This is done by using cold, cubed butter so that when the butter melts in the oven, it separates the dough and creates layers. This was the first recipe where I practiced kneading dough which was difficult because the cheese scones contained a lot of flour so it kept falling apart. They ended up requiring a lot of time and attention to make them into a workable consistency. This recipe was definitely something I would make again! Would go great with soup!
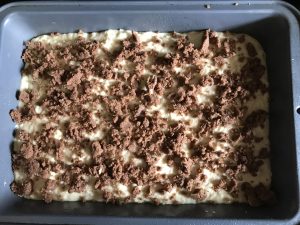
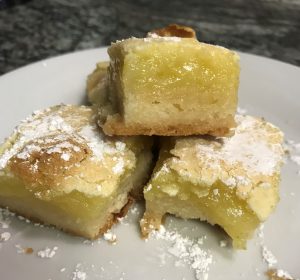 I got to say out of all of these recipes my biggest home run was the luscious lemon bars. I am still obsessing over them! This recipe had two sections, one for working and baking the crust and the other for the lemon filling. The crust was probably the most complicating, not to make but to prepare because it had to be assembled then compacted into a pan, perfectly level then frozen, then baked. The lemon filling was just time consuming requiring lemon juice and zest from 5-6 lemons. After following the recipe and baking it I got to tell you, they were delicious and stayed fresh the longest amount of time out of all the recipes. Through this experience I really built up my baking confidence and learned a good skill for whenever I make dessert bars in the future.
Following the lemon bars was one of my first flops; the cinnamon buns. This was the first time I have ever worked with yeast and was unsure on how to fully activate the yeast and the wait time that it required before adding the ingredients. I think that is where I went wrong, was the very beginning with the yeast and after that it didn’t rise and came out dense and hard. This recipe gave me experience and the opportunity to work with a more complex component of baking and was something that I was able to learn and grow from.
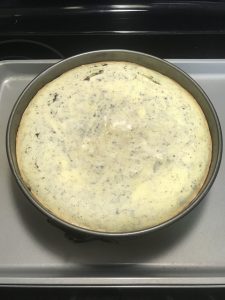 Unfortunately the cheesecake I made next added to my list of flops. This recipe was another first for me that contained many do’s and don’ts which didn’t help me much. I think the only thing that went wrong here was my cook time. I should have left it in the oven for a little longer then let it cool and set for longer than I did. Besides the uncooked portion of it, it turned out really well and was another learning experience for me which gave me insight towards what to do next time I bake a cheesecake. Or I could just choose a non-bake one…
Last but not least was my coffee cake. This was a simple but good one, a solid way to end my baking inquiry. In this recipe I learned how to make a crumble and was able to add another pastry recipe to my repertoire! I am very grateful for this experience. I feel as though I learned a lot about how to bake different recipes using different techniques. I not only improved my baking ability but I found a excellent way to take a mental break from studying and fill it with something that I enjoy and that my friends and family also enjoy! I cannot wait to continue on with my new found hobby and explore new recipes.
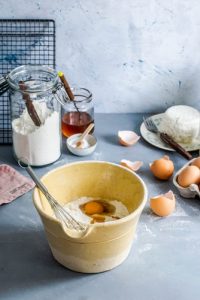
 The instructions for this recipe were pretty minimal, just saying to separate the wet and dry ingredients then mix them all together and pour it into the pan. It seemed easy enough it just stated in big bold letters not to over mix, so I was careful to only fold the ingredients in until just combined. Once I poured the batter into the pan I set the oven to 350 then started working on the yummy cinnamon topping. This was once again pretty basic and reminded me of the cinnamon filling I made for my cinnamon buns a few weeks back. After I had mixed the filling together to form a crumble I spread it evenly on top of my batter then was ready to set it into the oven.
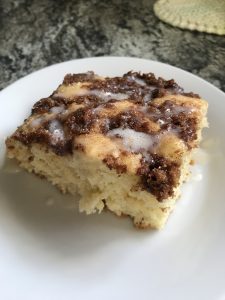 The cake was set to be in the oven for at least 33 minutes (this is what the recipe said) but after a little over 25 minutes I peaked inside because I was getting impatient. The edges were golden brown and it looked ready to go so I pulled it out and let it sit on a rack to cool. This was one issue that I had with this recipe, if I didn’t check it when I did, it would have probably been overcooked and very dry. After it cooled down I poured some icing on top of it and cut out a piece to try!
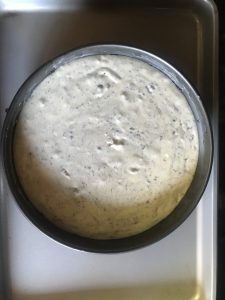 Hello again friends to another baking blog. I have been trying to make each recipe a bit harder than the last or at least more out of my comfort zone. And this week I did just that. A little while ago I went to a restaurant and had a slice of Oreo cheesecake for dessert, and ever since that night I have been going cheesecake crazy. I have been constantly craving it so I thought I would just go ahead and try to make it. Before I set my mind on it, I researched how to actually make a cheesecake to check out the level of difficulty. I came across an
 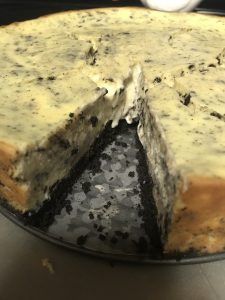 Then the moment of truth came when I dipped my knife into the cake to cut a piece. Right when I cut down the center of the cheesecake it seemed to sink right in and reveal a gooey center. Now, I am no cheesecake expert but I am sure that cheesecakes do not ooze, so this meant that the cheesecake is either under-baked or still needs time to set or both (which would be a big bummer). I was almost tempted to fire up the oven again but I know baking doesn’t typically work that way. Reluctantly I continued to cut a slice to analyze the taste and overall flavor. It wasn’t too sweet which was nice and the Oreo crust offered a nice bitterness to it. It wasn’t bad! I would give it a solid 6.5/10.
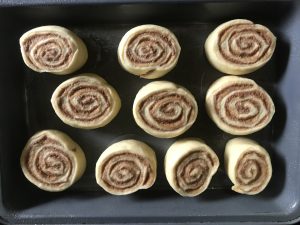 The first step in this recipe was to make the dough. This was the only part where I could go wrong in this recipe because of the yeast, if my milk was too warm or if my eggs and butter were too cold it wouldn’t work. I started by heating my milk up and then I sprinkled the yeast packet in and gave it a stir before adding the rest of my ingredients. After mixing all my ingredients, I kneaded my dough for 5 minutes and set it in a warm place to rise. This is the part where I crossed my fingers and hoped for the best. After 30 minutes I checked under the towel that was draped over top of the bowl and was instantly disappointed. It didn’t even rise an inch, or centimeter. I was just hoping that maybe it needed some more time to rise so I left it for another 20 minutes and then returned to the dough still in the same form. Absolutely heartbreaking.
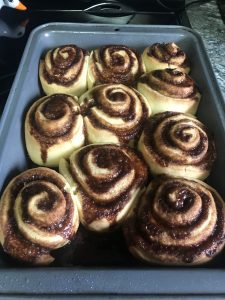 After putting so much time and effort into making this dough I thought I would still give it a shot so I rolled it out, spread my filling onto it then rolled it up and prepared it to bake. When it was all ready to go on my pan it looked really good honestly. The recipe recommended that it needed to be set aside to rise again before baking but we all know how that turned out the first time, so I just set it in the oven. After 17 minutes the cinnamon buns rose and were all yummy and golden brown. They looked really good and smelled amazing right out of the oven so I still had hope for them. After waiting for them to cool I topped them with my cream cheese frosting and called it a day.
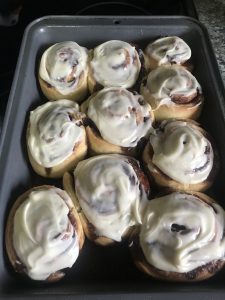 I would say these cinnamon buns ended up being passable. Not the best thing I have made nor the worst. They had really good taste and the filling and cream cheese was amazing but the texture was so off. They weren’t fluffy nor soft which are all the best things of a good cinnamon bun. I honestly don’t know where I went wrong but it must have been something with the yeast, maybe not letting it proof in the milk before adding the rest of my ingredients or not kneading it enough but this recipe was definitely harder than I thought it would be. Sadly I would rate these cinnamon buns a 6/10 because of the texture. I think next time I might try a different recipe and do more research on how to use active dry yeast.
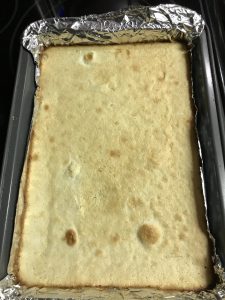
 During the baking process of my
 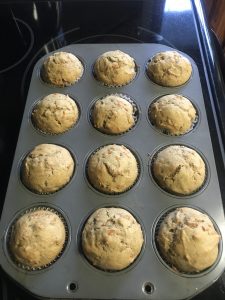 looked great! I followed the recipe exactly and I again was enjoying myself in the process. After everything was combined I set them in the oven and let them bake for 20-25 minutes as recommended. After 20 minutes I took them out and tested them with a toothpick to check if they were ready. After I pulled them out I set them on a cooling rack and waited a few minutes to try one. The muffins visually looked great, they rose really well and obtained a nice golden brown along the edges. Unfortunately I think they looked better than they tasted. I don’t know what it was but they just had no flavor. The texture of them was really great and they were nice and moist but they didn’t really taste like anything. Next time I think I will add more more of the spices specifically cinnamon and maybe some orange juice or some lemon juice. Other than that I was very proud of how they turned out and proud of myself for baking more goodies.
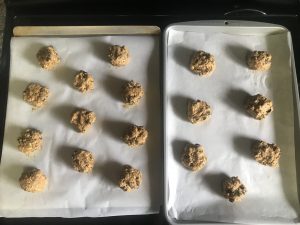 used 2 cups of oats which still seemed like an absurd amount. It was at this moment where I really thought I messed something up, i was thinking that maybe I didn’t add enough of one of the wet ingredients because it was so dry but I decided to leave it and hope that it would turn out in the end. After making the dough I set it in the fridge for 45 minutes to cool then took it out and started making little balls and setting them on to my trays lined with parchment paper.
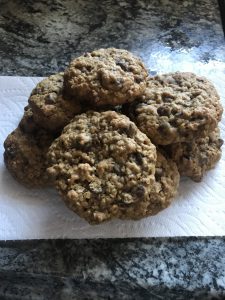 I then placed them in the oven for 15 minutes and crossed my fingers. After the 15 minutes I pulled them out, set them on a rack to cool and then tried them. I was very happy about how chewy they were, and how they were sweet but not too sweet which was a really nice surprise. Based on taste, texture and appearance I would give these cookies a 9/10. I think with some more chocolate chips they would be a home run but I just didn’t put enough in which is something that I now know to do next time. My overall experience while baking these cookies was actually very fun. It didn’t feel like i was doing homework, I was able to play some music and take my time to enjoy it which I felt like I needed. It was a very good break that also resulted in building my baking confidence and with a container full of cookies that I can proudly say I made.
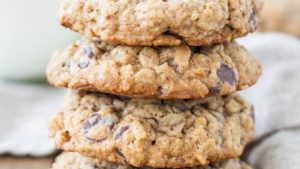
 my tech class. I can literally choose anything I want, like anything! I feel like I am at the worlds best ice cream parlor that has so many yummy flavors and I am told I can only choose one. It’s heartbreaking really, but the idea I always keep coming back to is baking. I would love to learn how to bake using different ingredients and different methods. You see, I have been working at a bakery for 4 years now, which is crazy, and resulting from this I can’t even make a batch of cookies from scratch. I don’t know how I have lived this long and have so much trouble following basic baking instructions. I haven’t fully thought out how I might approach this inquiry but I would like to start with something simple such as cookies and then slowly work my way up to baking a loaf of bread!